
Adobe Premiere Pro can use audio effect plug-ins that are also common in music production software.
If you already produce music, you may be able to use plug-ins you own for video editing. If your background is primarily in video, third-party effects can also be a useful solution when you need more control over audio.
Installing a plug-in alone does not make it immediately available. This guide explains how to have Premiere recognize the plug-in and insert it on a track.
Make Audio Effect Plug-Ins Available in Premiere
First, install the plug-in you want to use. Installation and activation procedures differ by product, so follow the plug-in’s manual and complete both steps.
After installation, launch Premiere. From the menu at the upper left, choose Preferences > Audio.

Click the Audio Plug-in Manager button near the bottom of the Preferences window.

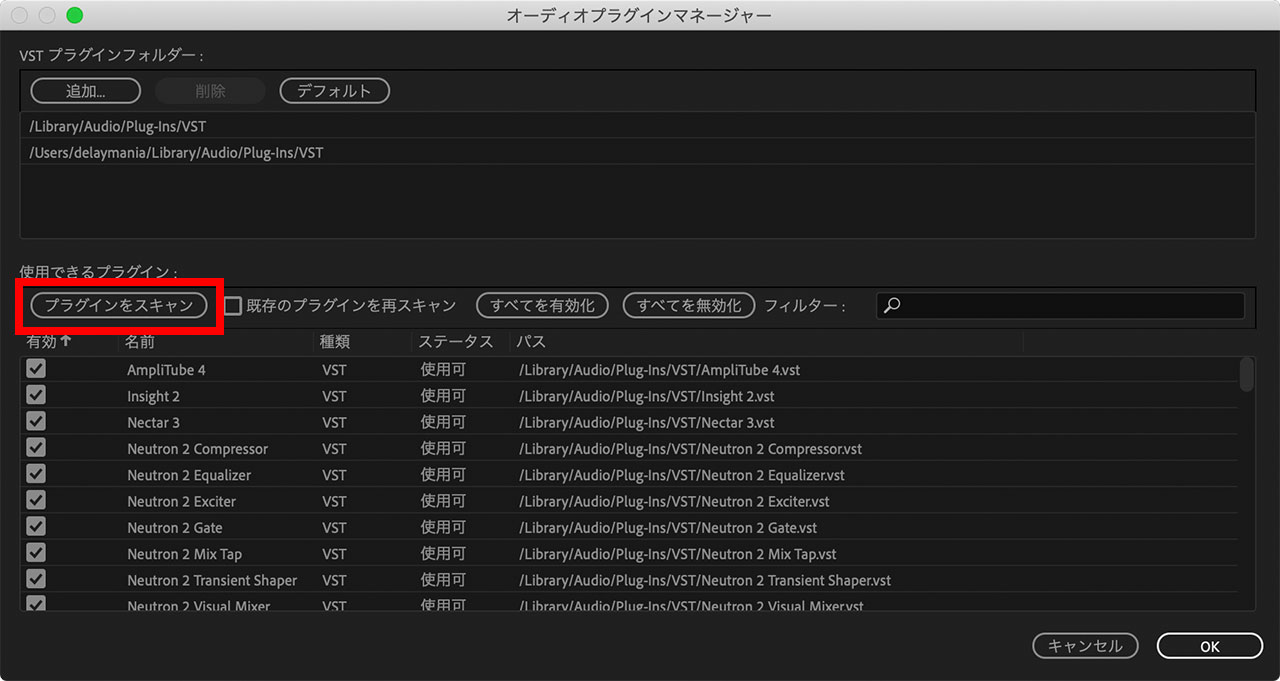
On the next screen, click Scan for Plug-ins. Premiere will load the plug-ins so that you can insert them on tracks.
Insert an Effect Plug-In in Premiere’s Track Mixer
After scanning the plug-ins, insert an effect on the track you want to process.
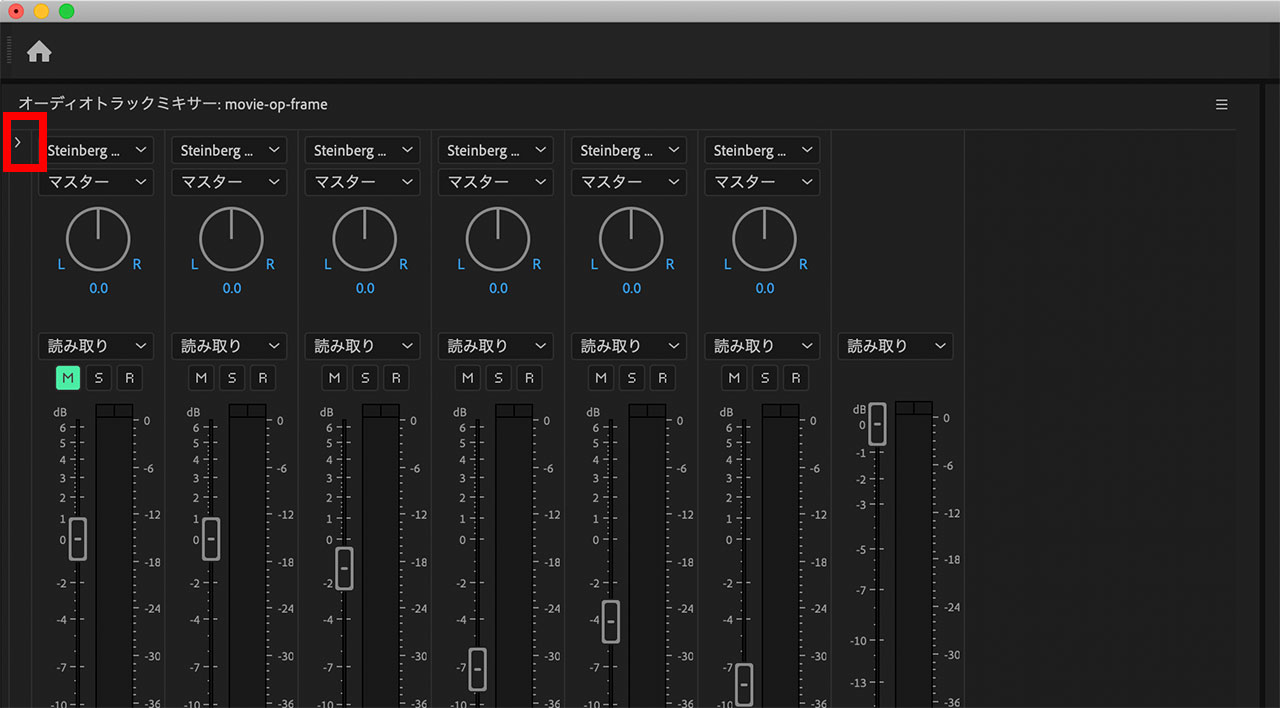
First, open the Audio Track Mixer. Premiere also has an Audio Clip Mixer with a similar name, but you need the Audio Track Mixer. Click “>” at the upper left.
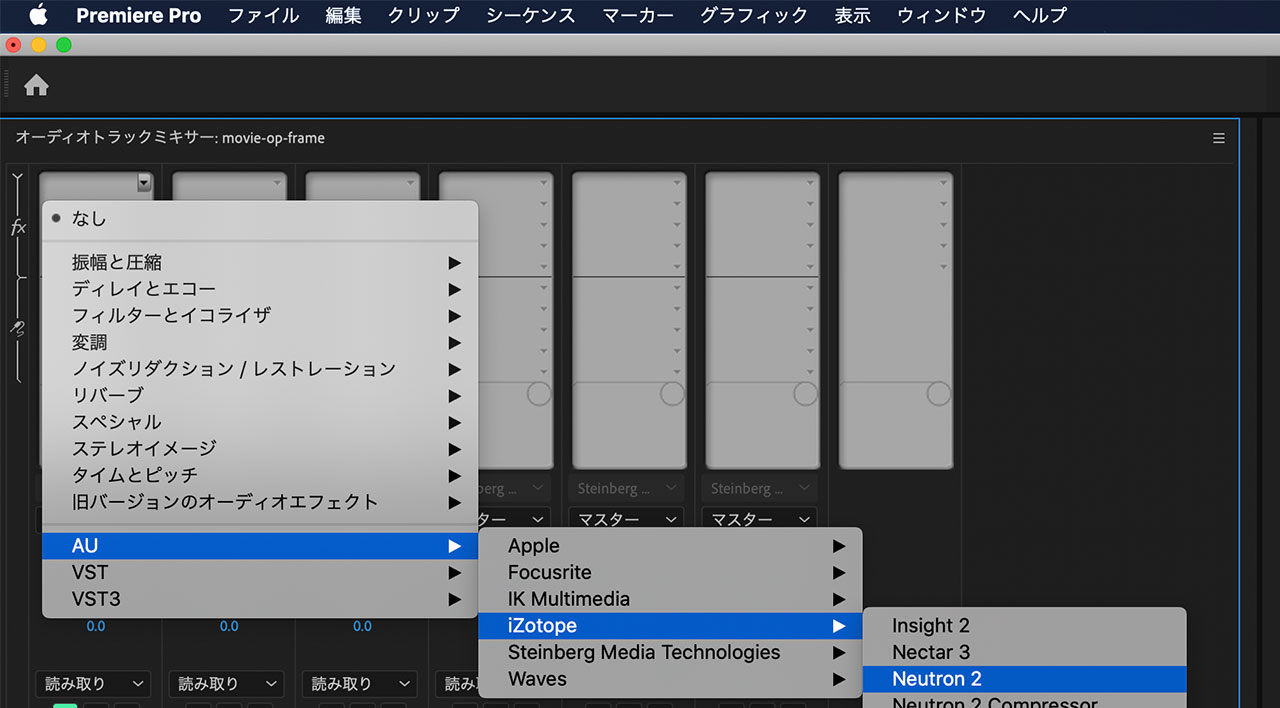
The effect insert area will open. Click the downward-pointing triangle in the insert area for the track you want to process.
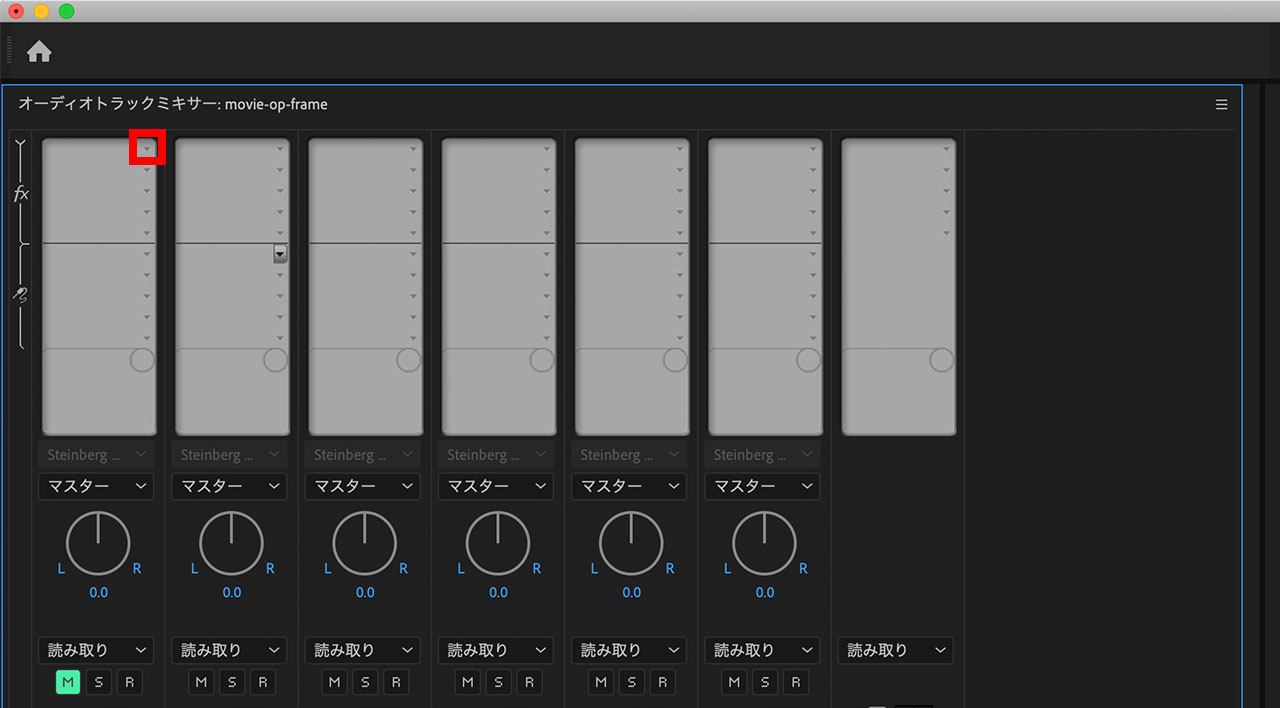
The plug-ins scanned earlier are now available. Select whichever one you want to insert.
RX 7 Is a Good Choice for Noise Removal
There are countless plug-ins from many developers, which can make it difficult to choose. One of my first recommendations is iZotope’s RX 7 noise-reduction software.
The following article explains it in detail. RX can remove a surprising amount of noise, such as air-conditioner sound accidentally captured during a recording.
