

If you use GarageBand or Logic Pro, you are probably familiar with Apple Loops. They are useful audio files that automatically follow the project tempo when you change the BPM.
You can create and register your own Apple Loops. Here is how.
Add Tempo Information to the Audio
Before turning your audio into an Apple Loop, you must add tempo information to it.
If you skip this step, the file will not follow the project when you change the BPM.
Double-click the audio region, open the Smart Tempo tab, and click Analyze.
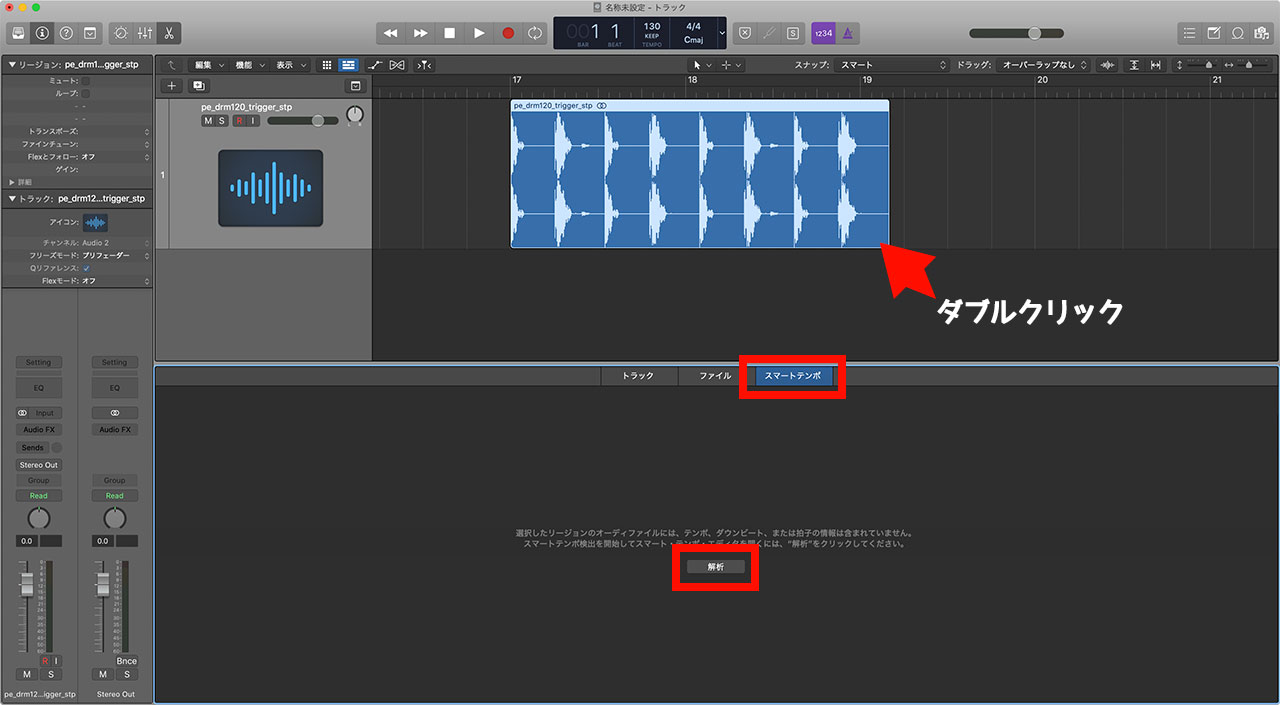
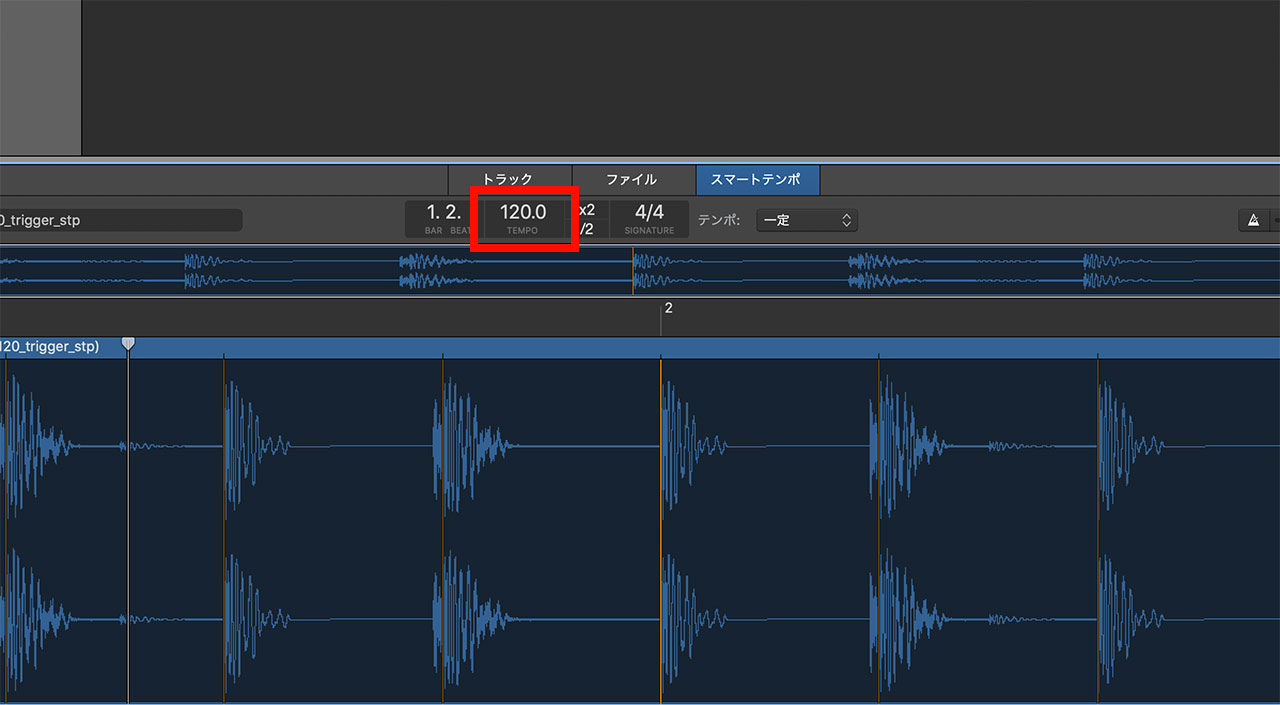
Logic will analyze the audio file’s tempo.
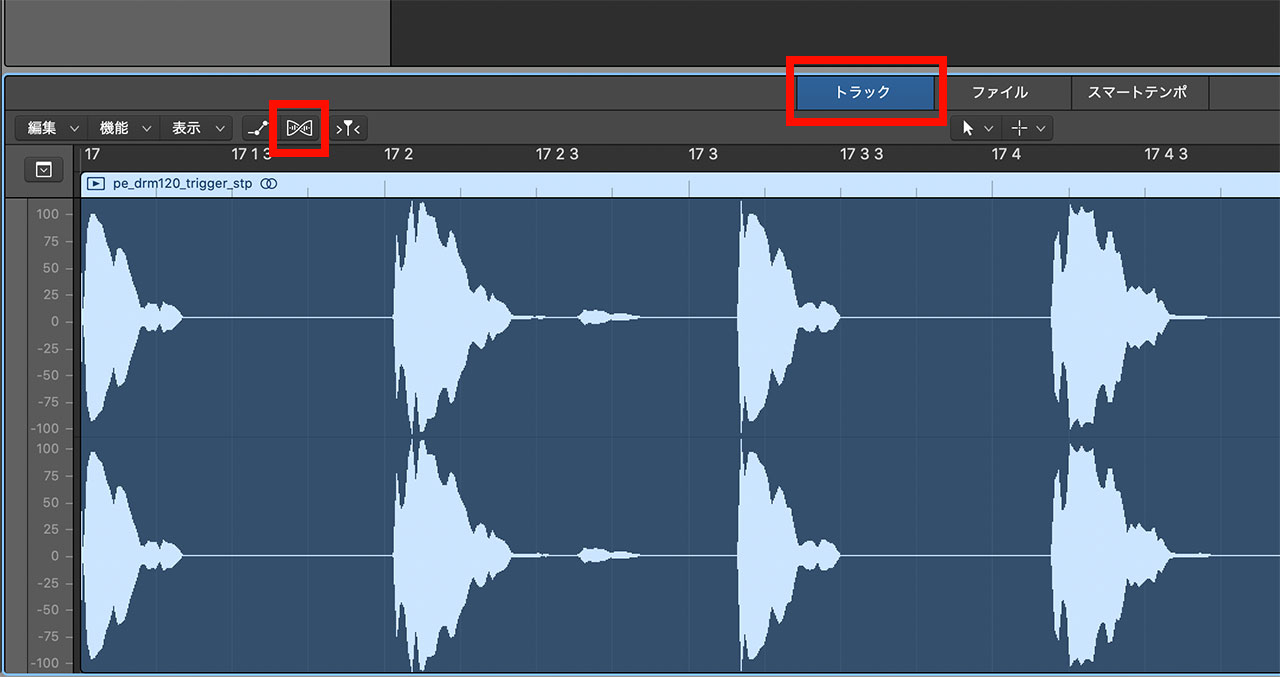
Open the Track tab and click the Flex button on the left.
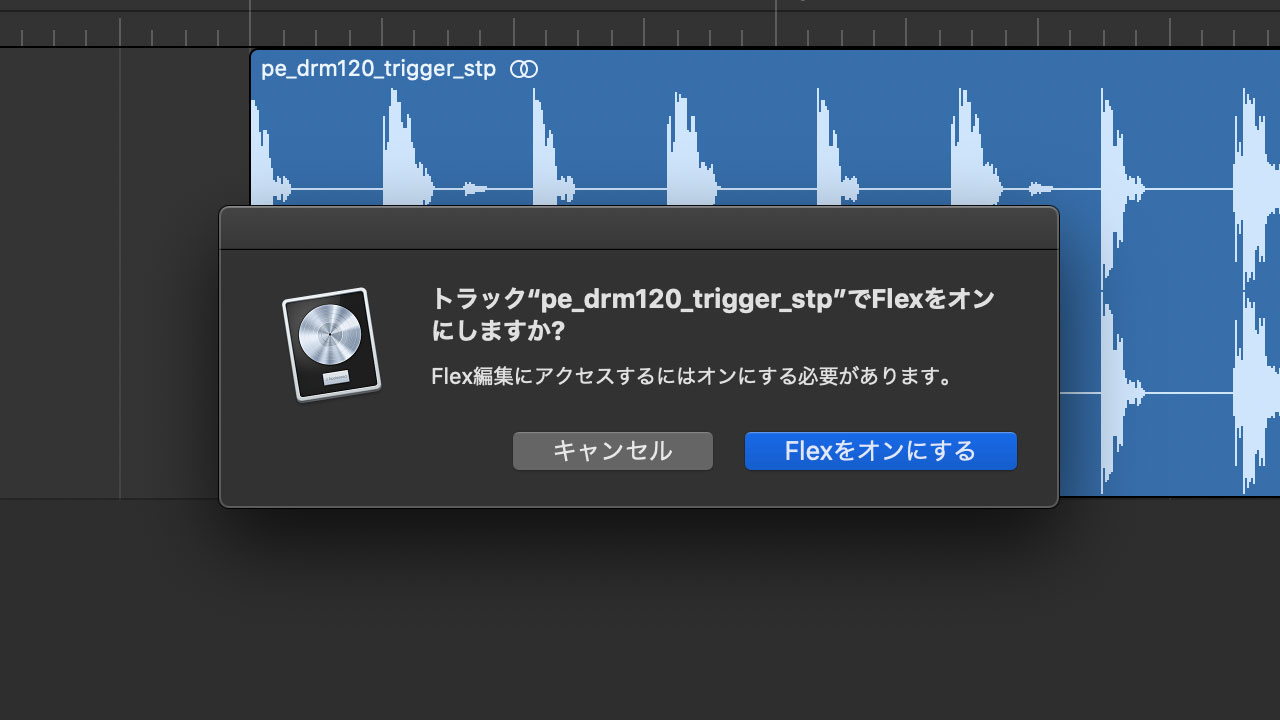
When the alert appears, choose to turn Flex on.
The audio is now ready to be converted into an Apple Loop.
At this point, the file will already follow any changes to the project BPM. If you do not plan to use it in other songs, you can stop here.
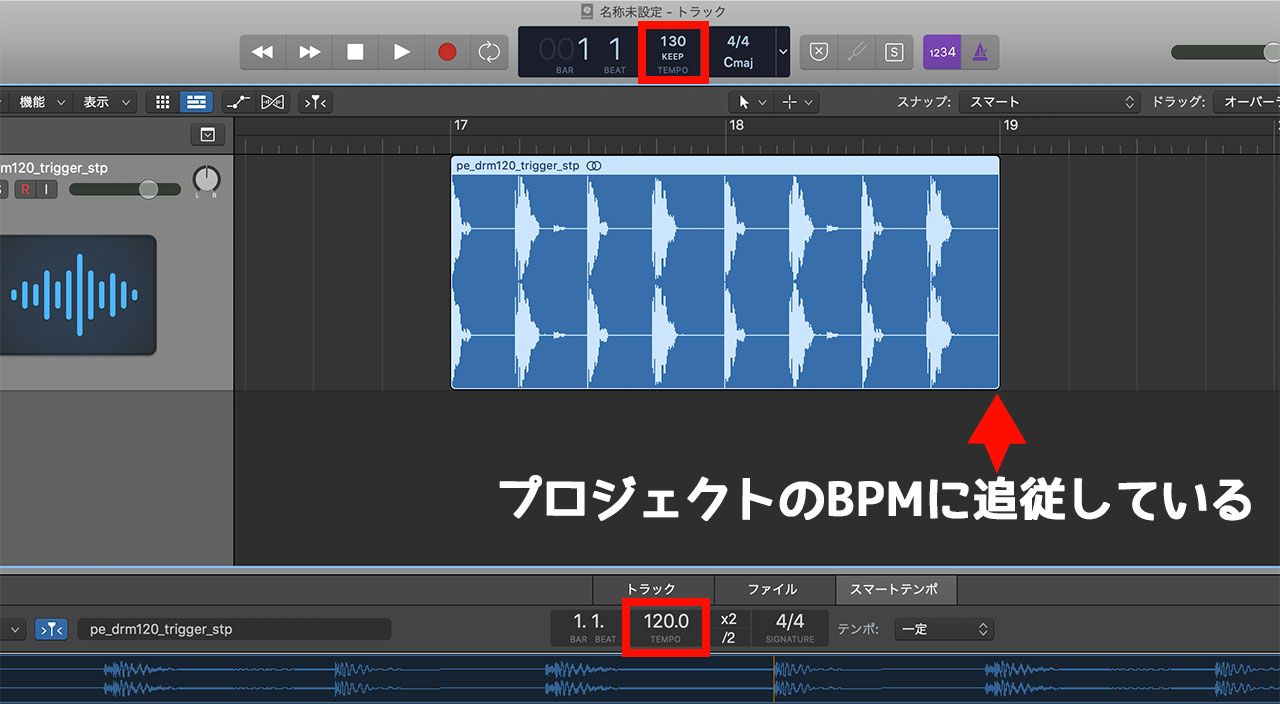
Convert the Audio into an Apple Loop
Now convert the prepared audio file into an Apple Loop.
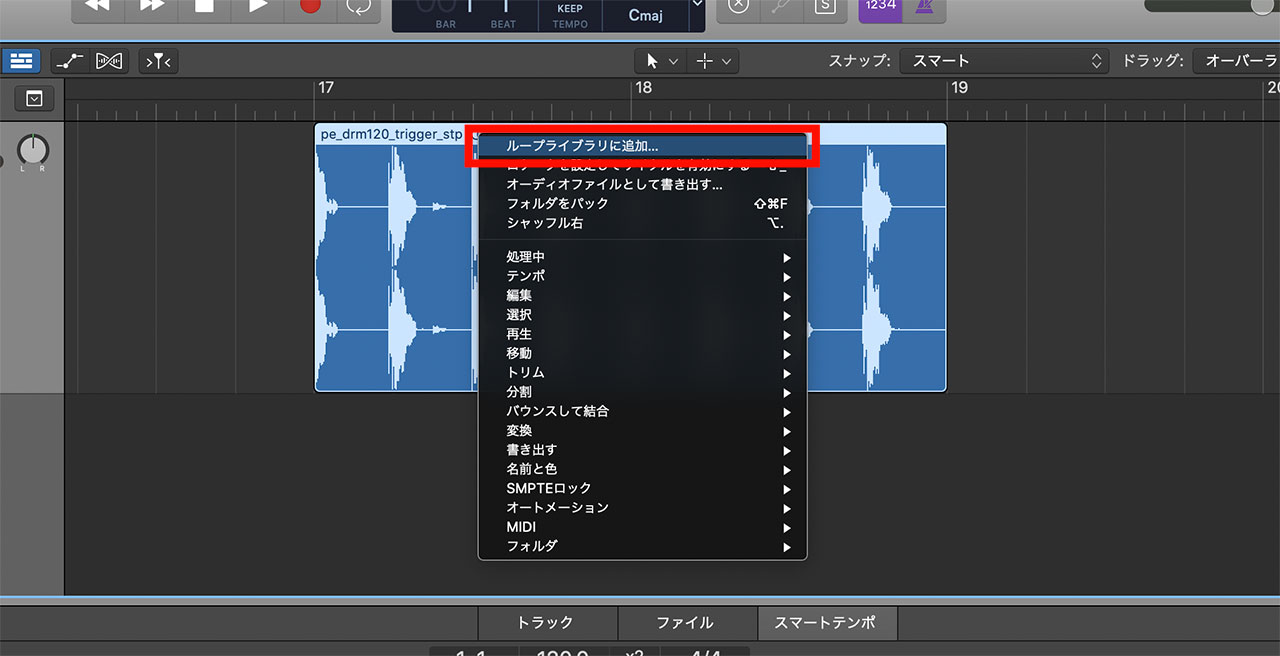
Secondary-click it to open the shortcut menu, then choose “Add to Loop Library.”
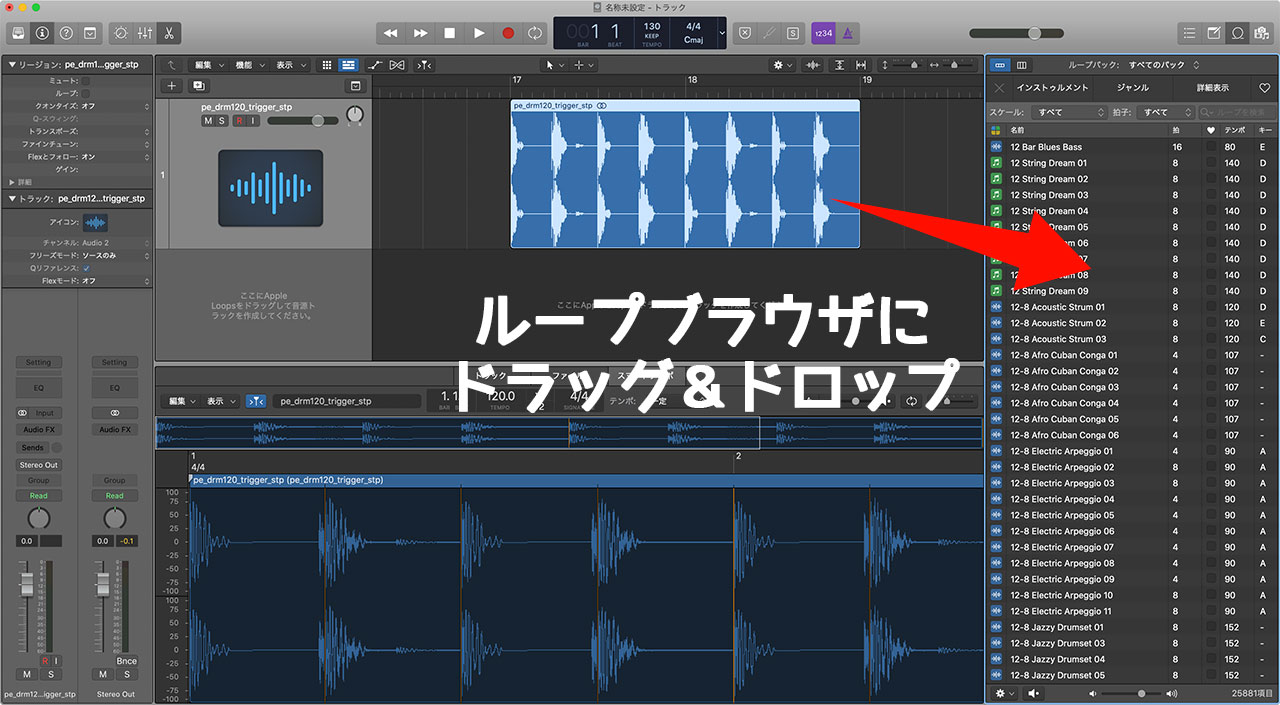
Alternatively, drag and drop it into the Loop Browser.
The Apple Loop settings window will open.
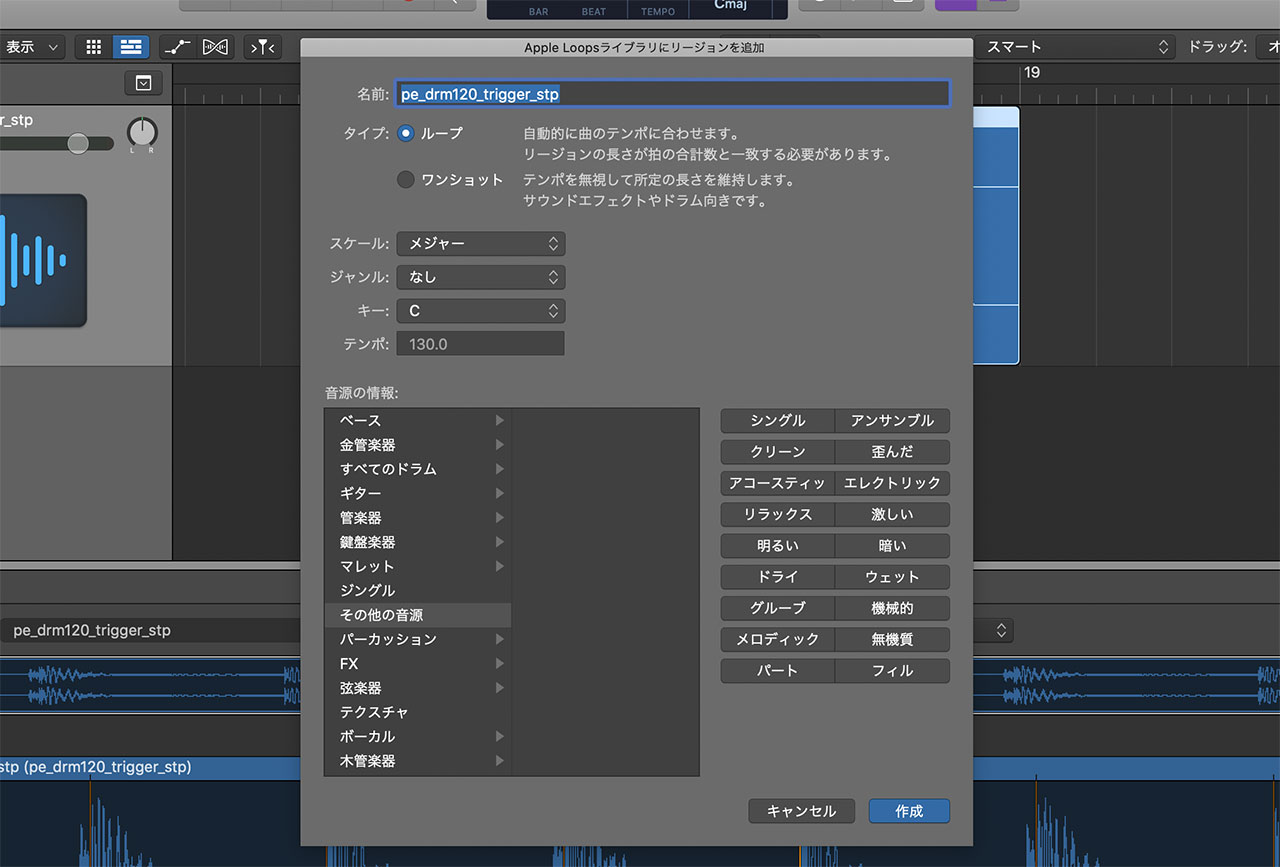
One point to note is that the tempo information is set from the project BPM. For easier use later, set the project to the same BPM as the original material, or at least a value close to it.
Set the category and tags however you prefer. Choose values that will make the loop easy to find.
How to Find Apple Loops You Created
Creating your own Apple Loops is not very useful if you cannot find them afterward, so here is where to look.
Open the Loop Packs pop-up menu at the top of the Loop Browser and choose “My Loops.”
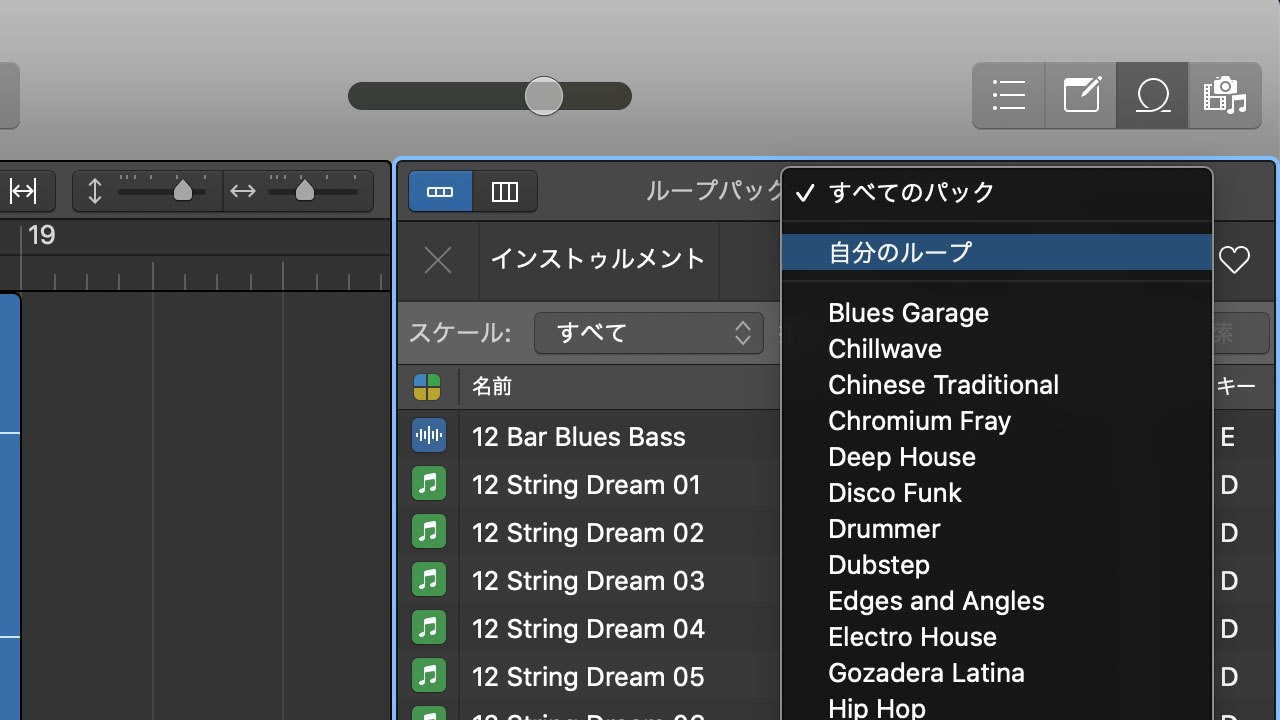
Your custom loops will appear, making it easy to find and use them.
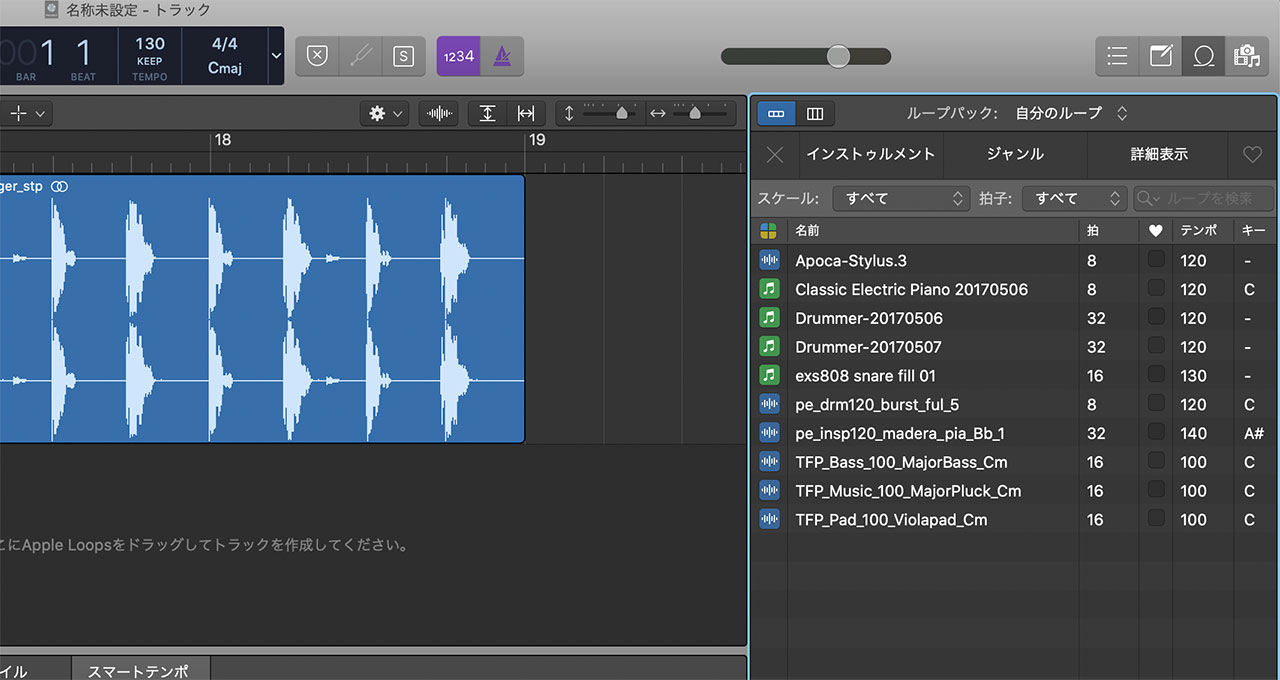
You can also find them by category or tag, or search for them by name.
Your custom Apple Loops are stored in the folder below. If you want to delete them or move several loops elsewhere, you can work with the files directly in this location.
/Users/your-user-name/Library/Audio/Apple Loops/User Loops
